Images & Media
RailsPress supports images for posts and content elements, with a built-in focal point system for intelligent cropping.
Configuration
Image features are configuration-driven. Enable the options you need in your RailsPress initializer.
Railspress.configure do |config|
  config.enable_post_images   # header images on posts
  config.enable_focal_points  # optional, requires post images
  config.enable_cms           # optional, for image content elements
end
See Configuration and Focal Points for full setup details.
Header Images
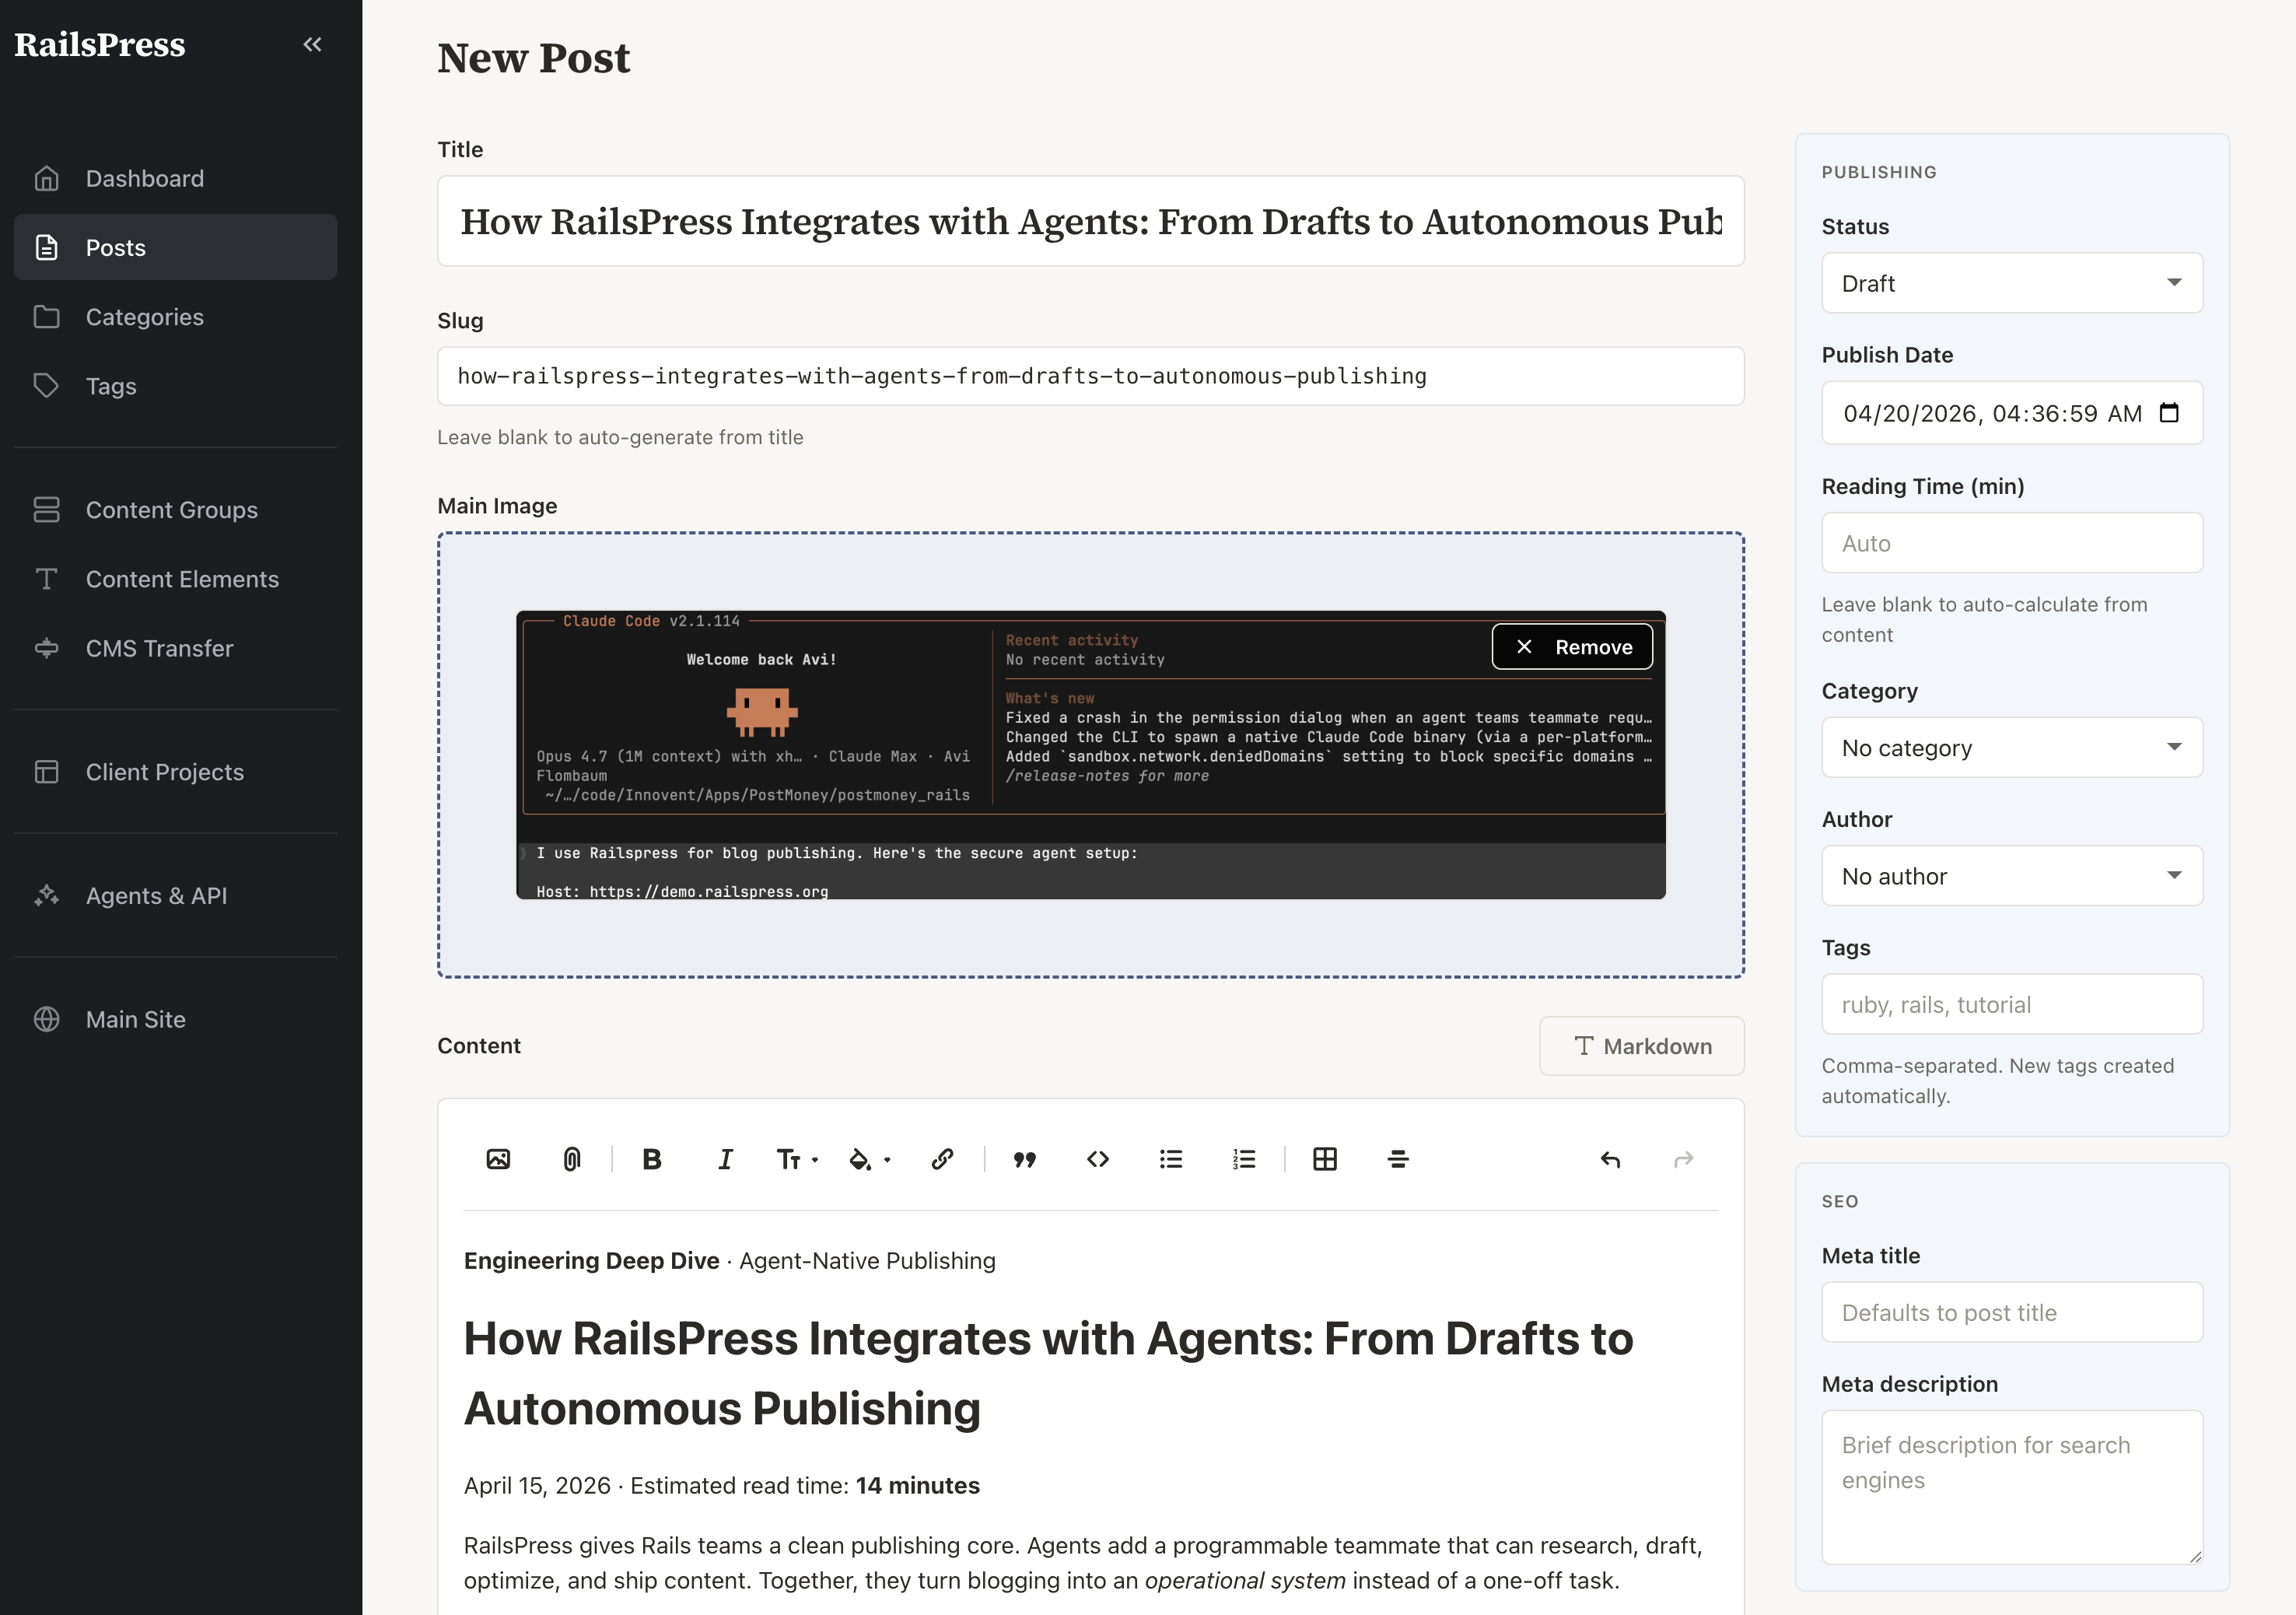
A main image (also called a header or featured image) appears at the top of a blog post and in post listings. It is the visual centerpiece of your post -- the first thing readers notice.
To add a header image:
Open the post editor
Go to Posts and click on the post you want to add an image to.
Find the image upload area
In the post editor sidebar, look for the Main Image section.
Upload your image
Drag and drop an image file onto the upload area, or click to browse your computer. Once uploaded, you will see a preview of the image.
Header images are automatically optimized for the web. They may also appear in social media previews when your post is shared. To remove a header image, use the remove option in the image area.
Choose images that are large enough to look crisp at full width. A width of at least 1200 pixels is a good starting point.
Images in Posts
Each post supports a single header image -- the featured image described above. Posts do not have a separate gallery feature for attaching multiple images at once.
However, you can include additional images within the body of your post by using the rich text editor. While writing your content, use the editor's image embed tool to insert images directly into the text. This works well for step-by-step tutorials, product showcases, or any content that benefits from images placed alongside the text.
For the best reading experience, place images near the text that references them. This helps your readers follow along naturally.
Focal Points
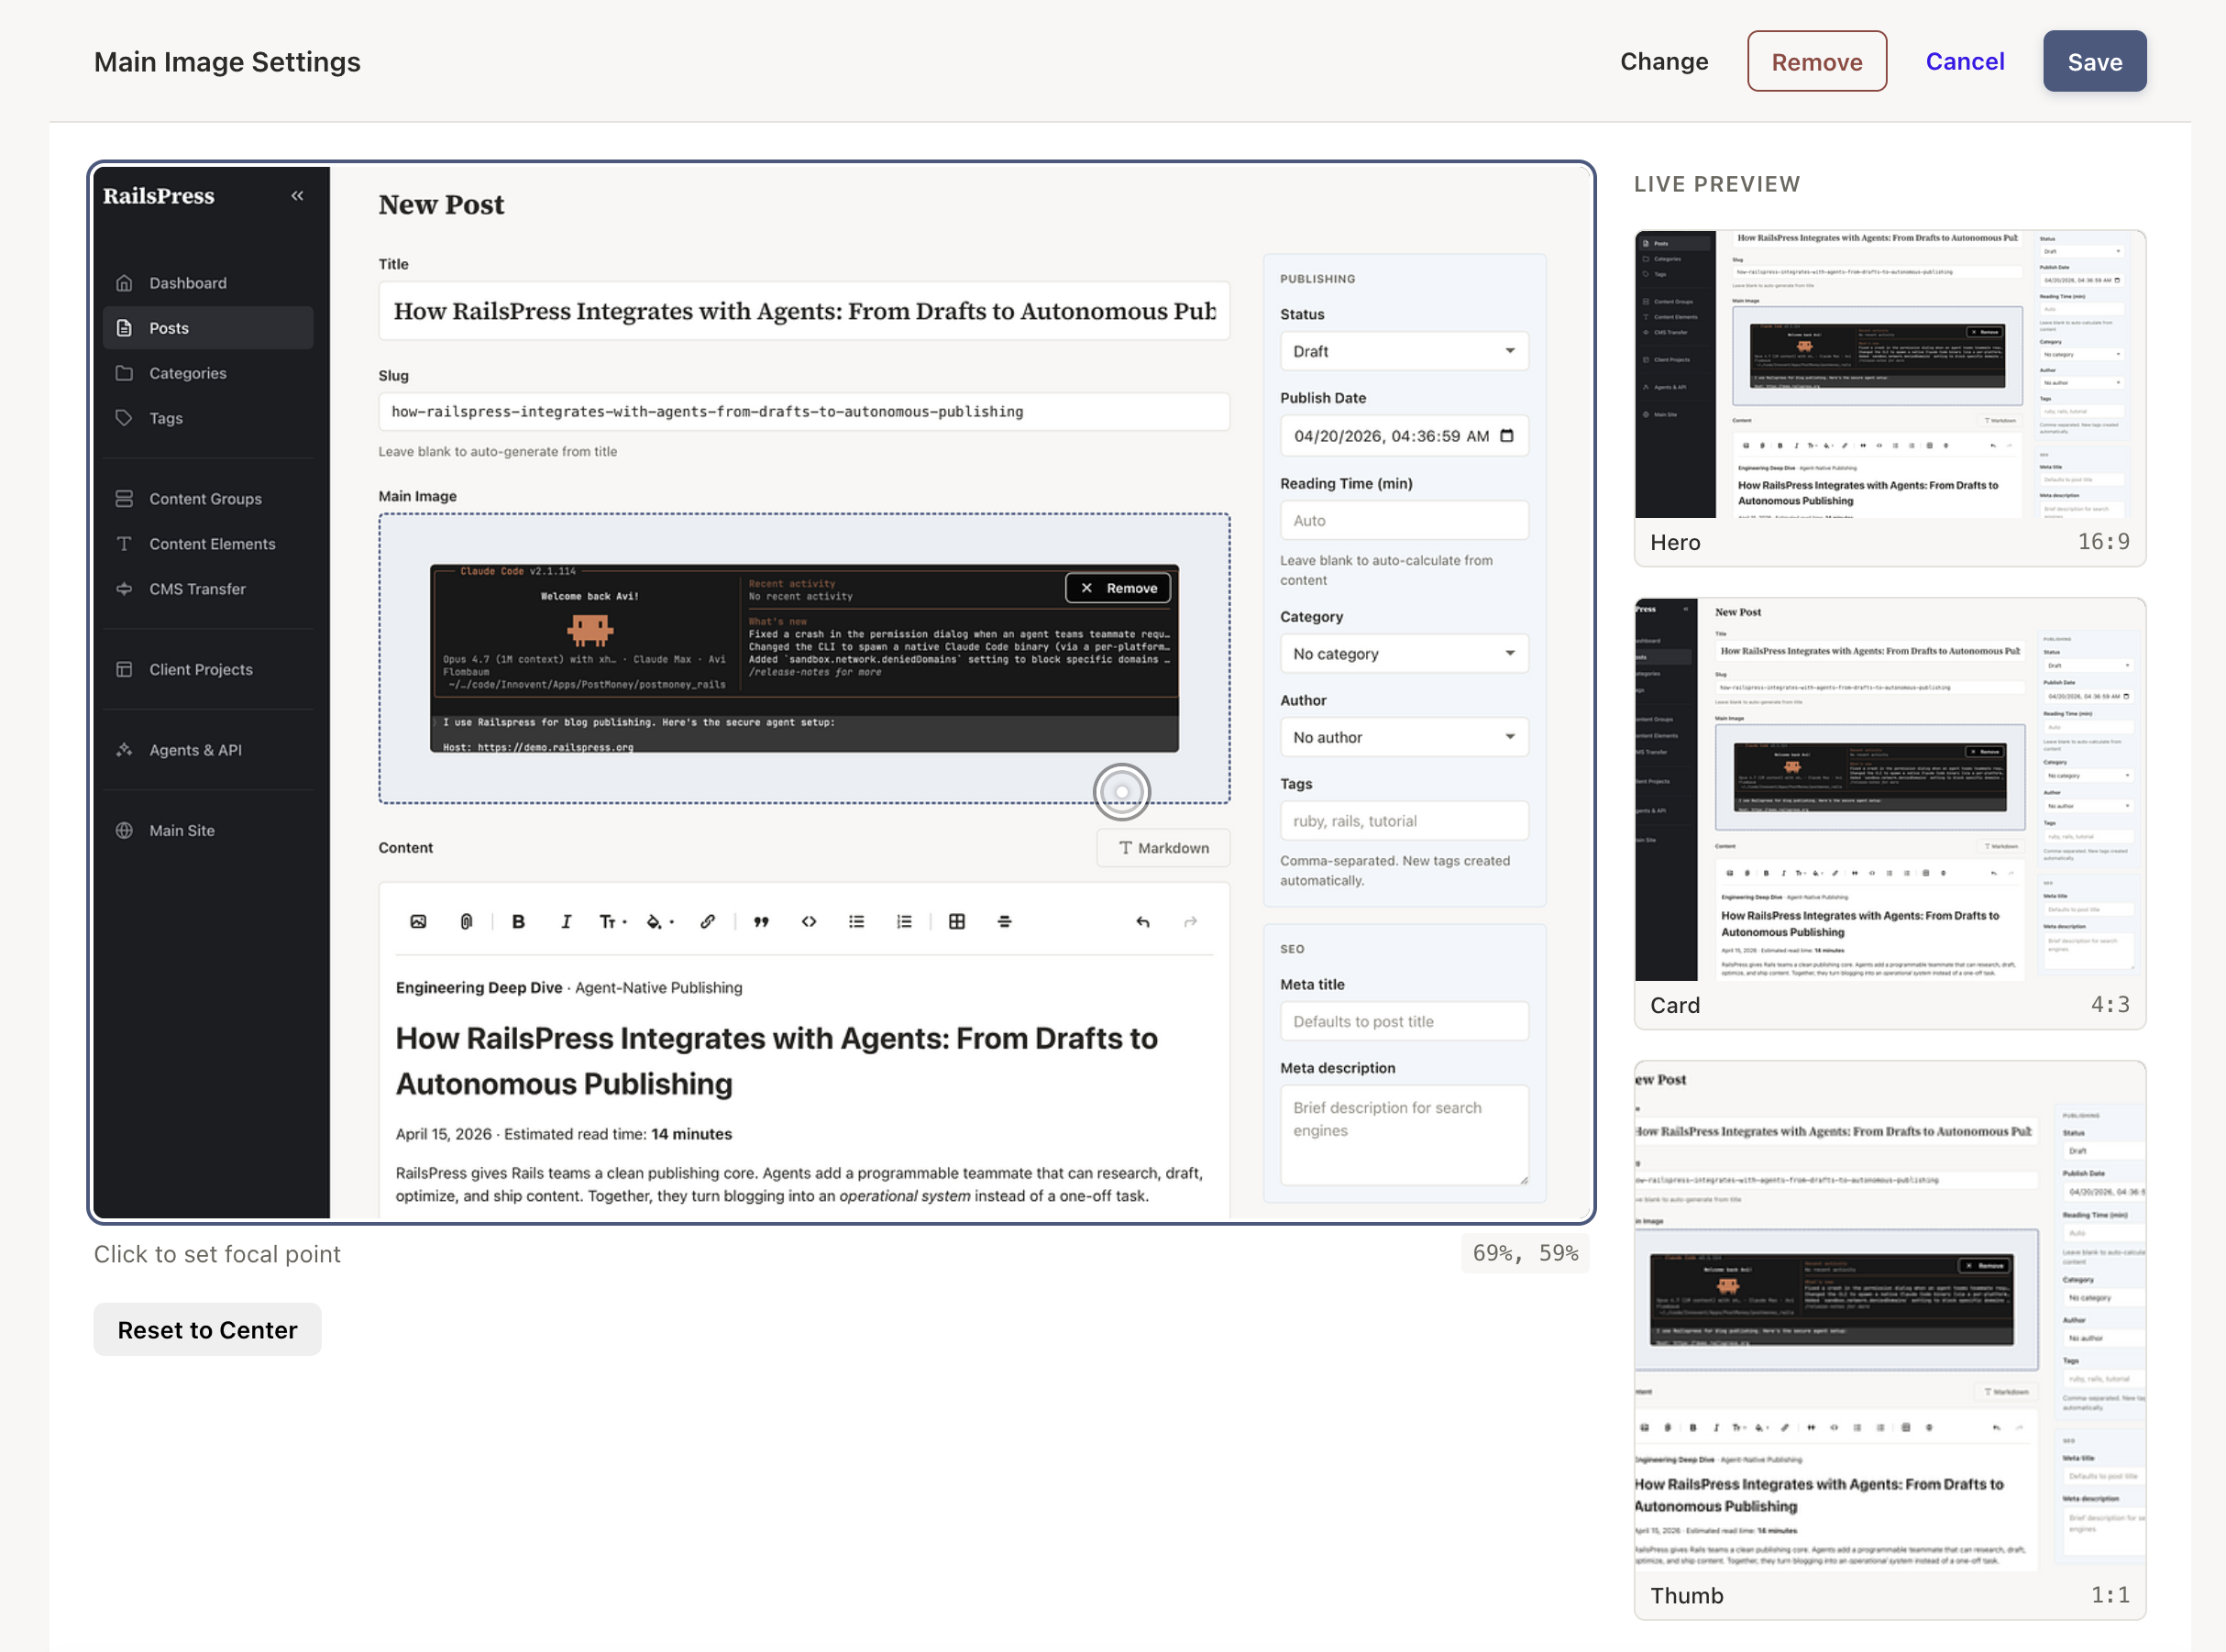
Your images are displayed at many different sizes across your site -- a wide banner on a desktop, a small thumbnail on a phone, a square crop for social media. Without guidance, these different crops might cut off the most important part of the image.
The focal point system solves this. It lets you mark the most important part of an image, and RailsPress makes sure that part stays visible no matter how the image is cropped or resized.
To set a focal point:
Open the image
Navigate to the post or Content Element that has the image you want to adjust.
Click on the important area
Click directly on the part of the image that matters most. A crosshair marker will appear at that position.
Adjust if needed
Drag the marker to fine-tune the position. You can reset it to the center at any time.
This is especially useful for:
- Photos of people: Keep the face in view, even in tight crops.
- Product images: Ensure the product stays centered and visible.
- Landscapes with a subject: Make sure the key subject is not cropped out at smaller sizes.
Your image may appear in several different contexts on your site -- for example, as a large hero banner at the top of a page, a smaller card thumbnail in a listing, or a social media preview. By default, every context uses the same focal point to decide how to crop the image. However, you can also customize how the image appears in each context individually -- for example, by setting a different crop region for the card thumbnail than for the hero banner, or even uploading a completely different image for a specific context.
By default, the focal point is set to the center of the image. You only need to change it when the subject of your image is off-center. Per-context overrides are optional -- most images work well with a single focal point across all sizes.
Image Content Elements
Content Elements can hold images as well as text. When a Content Element is set to the "image" type, you can upload an image directly to that element.
Image Content Elements are useful for managing specific images on your site that live outside of blog posts. For example:
- A team photo on your About page.
- A product image in a feature section.
- A logo or icon in the header or footer.
- A background image for a hero banner.
Image Content Elements work just like other image uploads in RailsPress: drag and drop or click to browse, see a preview of what you have uploaded, and set a focal point to control how the image is cropped at different sizes.
Need to update a photo on your site? Find the right Content Group, click on the image element, and upload the new image. The change goes live as soon as you save.